封面画师:画师JW 封面ID:78042954
基本程序单元 Activity
Activity 概述
Activity 中文含义:活动,但是在 Android 中 Activity 的含义是手机屏幕的一屏,它是 Android 程序中重要的基本组件之一。
Activity 的 4 种状态
运行状态 :当安卓应用在运行时,此时就是处于运行状态。
暂停状态 :当我们在安卓应用中执行退出时,此时应用往往会弹出「确认退出」的对话框,此时就是处于暂停状态。
停止状态 :在 暂停状态 时,我们点击了「确认退出」的对话框中的「确认」按钮后,此时就是处于停止状态。
销毁状态 :当我们在系统后台将某个安卓应用进程杀掉后,此时就是处于销毁状态。
运行状态和暂停状态是可见的,其他两种是不可见的。
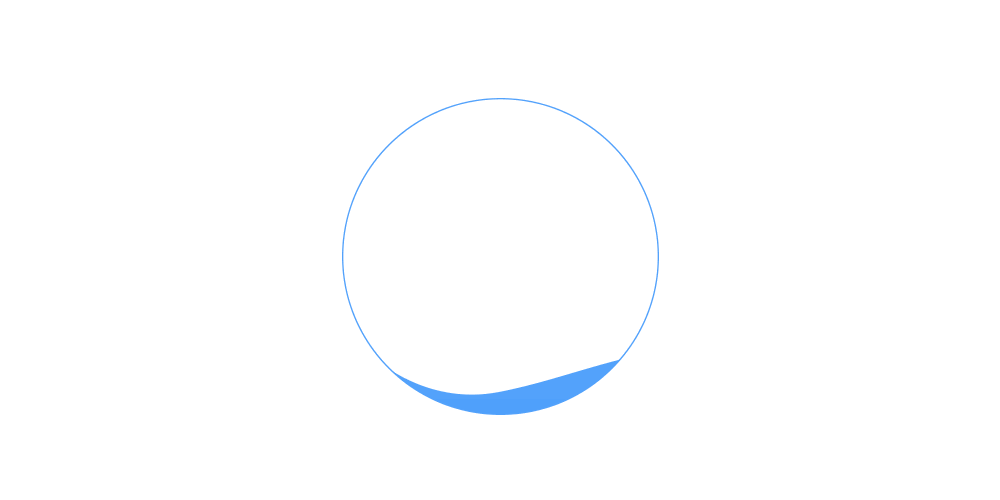
Activity 的生命周期
矩形框内表示内容可已被回调的方法,非矩形框内表示Activity的重要状态。
创建、启动和关闭 Activity
创建 Activity
创建继承自 Activity 的 Activity;
1 public class DetailActivity extends Activity {...}
重写需要的回调方法;
设置要显示的视图;
1
2
3
4
5
@ Override //通常重写onCreate()方法 protected void onCreate ( Bundle savedInstanceState) { super . onCreate (savedInstanceState); setContentView ( R . layout . activity_main ) ; //设置布局 }
到这一步,Activity 的基本骨架已经完成,但是这样的 Activity 并不能成功运行。
我们还需要 配置我们定义的Activity 。
进入 AndroidManifest.xml 进行配置:
注意:我们在配置 Activity 时,需要注意我们自定义的 Activity 是否在该配置文件制定的包下,如果不在,需要我们书写包名。
1
2
3
4
5
6
7
8
9
10
11
12
13
14
15
<? xml version = "1.0" encoding = "utf-8" ?> < manifest xmlns:android = "http://schemas.android.com/apk/res/android" package = "com.yang.activity" > <!--注意此处的package属性值--> < application ...> < activity android:name = ".MainActivity" > < intent-filter > < action android:name = "android.intent.action.MAIN" /> < category android:name = "android.intent.category.LAUNCHER" /> </ intent-filter > </ activity > <!--注册的Activity--> < activity android:name = ".DetailActivity" android:label = "详细" ></ activity > </ application > </ manifest >
当然我们也可以使用Android Studio直接创建Activity。
启动 Activity
当我们创建并配置好一个 Activity 后,Activity 并不会直接显示在屏幕上,还需要我们启动它。
对于入口Activity,我们可以在AndroidManifest.xml进行配置: (将一个 Activity 配置成程序入口)
1
2
3
4
5
6
7
<!--配置一个intent过滤器--> < intent-filter > <!--把一个Activity设置为程序的主启动项--> < action android:name = "android.intent.action.MAIN" /> <!--指定在什么环境下这个动作才会被响应--> < category android:name = "android.intent.category.LAUNCHER" /> </ intent-filter >
Intent理解: 我们假设把 Activity 比作成一个人,那么 Intent 就相当于这个人的想法。可见,Activity 需要通过 Intent 来表达自己的「意图」。我们可以在后面内容的 Intent 处看到其详细理解。
对于其他的Activity我们可以使用 startActivity() 来启动一个Activity。
在 MainActivity 中启动 DetailActivity:
activity_main.xml:
1
2
3
4
5
< Button android:id = "@+id/button1" android:layout_width = "wrap_content" android:layout_height = "wrap_content" android:text = "查看详细" />
detail_main.xml:
1
2
3
4
5
6
7
8
9
< TextView android:layout_width = "wrap_content" android:layout_height = "wrap_content" android:text = "详细内容" /> < Button android:id = "@+id/Button_close" android:layout_width = "wrap_content" android:layout_height = "wrap_content" android:text = "关闭" />
MainActivity.java:
1
2
3
4
5
6
7
8
9
10
11
12
13
14
15
16
17
public class MainActivity extends AppCompatActivity { @ Override protected void onCreate ( Bundle savedInstanceState ) { super . onCreate (savedInstanceState); setContentView ( R . layout . activity_main ); Button button = findViewById ( R . id . button1 ); button . setOnClickListener ( new View. OnClickListener () { @ Override public void onClick ( View v) { //创建Intent对象,参数为上下文对象和跳转的界面的Activity的类 Intent intent = new Intent ( MainActivity . this , DetailActivity . class ); //启动Activity startActivity (intent); } }); } }
关闭 Activity
直接使用 finish() 即可。
如果关闭的Activity不是主入口,那么关闭这个Activity就会返回到调用它的Activity中。如果是主入口的Activity,就会返回到主屏当中。
我们在 DetailActivity 中进行编写:
1
2
3
4
5
6
7
8
9
10
11
12
13
14
public class DetailActivity extends AppCompatActivity { @ Override protected void onCreate ( Bundle savedInstanceState ) { super . onCreate (savedInstanceState); setContentView ( R . layout . activity_detail ); Button button = findViewById ( R . id . Button_close ); button . setOnClickListener ( new View. OnClickListener () { @ Override public void onClick ( View v) { finish (); } }); } }
实现刷新当前 Activity:直接调用 onCreate(null); 即可
多个 Activity 的使用
Bundle
Bundle :一个键值对的组合,要读取时,我们只需要使用 key 就可以找到对应的 value。
可以使用Bundle在Activity之间交换数据。
使用 Bundle 数据交互示意图:
模拟淘宝填写并显示收货地址的功能(数据交互)
activity_main.xml:
1
2
3
4
5
6
7
8
9
10
11
12
13
14
15
16
17
18
19
20
21
22
23
24
<? xml version = "1.0" encoding = "utf-8" ?> < LinearLayout xmlns:android = "http://schemas.android.com/apk/res/android" xmlns:app = "http://schemas.android.com/apk/res-auto" xmlns:tools = "http://schemas.android.com/tools" android:layout_width = "match_parent" android:layout_height = "match_parent" android:orientation = "vertical" tools:context = ".MainActivity" > < EditText android:id = "@+id/myAddress" android:layout_width = "match_parent" android:layout_height = "wrap_content" android:hint = "请输入你的地址" /> ... < Button android:id = "@+id/btn" android:layout_width = "wrap_content" android:layout_height = "wrap_content" android:layout_marginStart = "10dp" android:layout_marginEnd = "10dp" android:layout_marginTop = "10dp" android:background = "#FF5000" android:text = "保存" /> </ LinearLayout >
activity_address.xml:
1
2
3
4
5
6
7
8
9
10
11
12
13
14
<? xml version = "1.0" encoding = "utf-8" ?> < LinearLayout xmlns:android = "http://schemas.android.com/apk/res/android" xmlns:app = "http://schemas.android.com/apk/res-auto" xmlns:tools = "http://schemas.android.com/tools" android:layout_width = "match_parent" android:layout_height = "match_parent" android:orientation = "vertical" tools:context = ".addressActivity" > < TextView android:id = "@+id/address" android:layout_width = "wrap_content" android:layout_height = "wrap_content" /> ... </ LinearLayout >
MainActivity.java:
1
2
3
4
5
6
7
8
9
10
11
12
13
14
15
16
17
18
19
20
21
22
23
24
public class MainActivity extends AppCompatActivity { @ Override protected void onCreate ( Bundle savedInstanceState ) { super . onCreate (savedInstanceState); setContentView ( R . layout . activity_main ); Button button = findViewById ( R . id . btn ); button . setOnClickListener ( new View. OnClickListener () { @ Override public void onClick ( View v) { String address = ((EditText) findViewById ( R . id . myAddress )). getText (). toString (); if ( ! "" . equals (address)){ Intent intent = new Intent ( MainActivity . this , addressActivity . class ); Bundle bundle = new Bundle (); bundle . putCharSequence ( "address" ,address); intent . putExtras (bundle); startActivity (intent); } else { Toast . makeText ( MainActivity . this , "请填写完整的信息!" , Toast . LENGTH_SHORT ). show (); } } }); } }
AddressActivity.java:
1
2
3
4
5
6
7
8
9
10
11
12
public class addressActivity extends AppCompatActivity { @ Override protected void onCreate ( Bundle savedInstanceState ) { super . onCreate (savedInstanceState); setContentView ( R . layout . activity_address ); Intent intent = getIntent (); Bundle bundle = intent . getExtras (); String address = bundle . getString ( "address" ); TextView textView_address = findViewById ( R . id . address ); textView_address . setText (address); } }
调用另一个 Activity 并返回结果
startActivityForResult(); 在此需要使用这个方法!
startActivityForResult() 方法的基本格式如下:
1 public void startActivityForResult ( Intent intent , int requestCode)
requestCode 顾名思义是请求码的含义,需要程序员 自定义 。
示例:
1
2
3
4
//创建Intent对象 Intent intent = new Intent ( MainActivity . this , DetailActivity . class ) ; //启动新的Activity startActivityForResult (intent , 0x007 ) ;
实现头像的切换: 需要准备 6 张图片,1 张默认头像,5 张可供选择的头像。
activity_main.xml:
1
2
3
4
5
6
7
8
9
10
11
12
< ImageView android:id = "@+id/imageView" android:layout_width = "100dp" android:layout_height = "100dp" android:layout_gravity = "center_horizontal" android:src = "@drawable/avatar" /> < Button android:id = "@+id/btn" android:layout_width = "wrap_content" android:layout_height = "40dp" android:layout_gravity = "center_horizontal" android:text = "选择头像" />
activuty_head.xml:
1
2
3
4
5
6
7
8
< GridView android:id = "@+id/gridview" android:layout_width = "match_parent" android:layout_height = "match_parent" android:layout_marginTop = "10dp" android:horizontalSpacing = "3dp" android:verticalSpacing = "3dp" android:numColumns = "4" />
MainActivity.java:
1
2
3
4
5
6
7
8
9
10
11
12
13
14
15
16
17
18
19
20
21
22
23
24
25
26
public class MainActivity extends Activity { @ Override protected void onCreate ( Bundle savedInstanceState ) { super . onCreate (savedInstanceState); setContentView ( R . layout . activity_main ); Button button = findViewById ( R . id . btn ); button . setOnClickListener ( new View. OnClickListener () { @ Override public void onClick ( View v) { Intent intent = new Intent ( MainActivity . this , HeadActivity . class ); startActivityForResult (intent, 0x11 ); } }); } @ Override protected void onActivityResult ( int requestCode , int resultCode , Intent data ) { super . onActivityResult (requestCode, resultCode, data); if (resultCode == 0x11 && resultCode == 0x11 ){ Bundle bundle = data . getExtras (); int image = bundle . getInt ( "image" ); ImageView imageView = findViewById ( R . id . imageView ); imageView . setImageResource (image); } } }
HeadActivity.java:
1
2
3
4
5
6
7
8
9
10
11
12
13
14
15
16
17
18
19
20
21
22
23
24
25
26
27
28
29
30
31
32
33
34
35
36
37
38
39
40
41
42
43
44
45
46
47
48
49
50
51
public class HeadActivity extends AppCompatActivity { private int [] pics = new int []{ R . drawable . boy , R . drawable . boy2 , R . drawable . girl , R . drawable . longhairgirl , R . drawable . shorthairgirl } ; @ Override protected void onCreate ( Bundle savedInstanceState ) { super . onCreate (savedInstanceState); setContentView ( R . layout . activity_head ); GridView gridView = findViewById ( R . id . gridview ); BaseAdapter adapter = new BaseAdapter () { @ Override public int getCount () { //注意此处记得修改 return pics . length ; } @ Override public Object getItem ( int position ) { //注意此处记得修改 return position; } @ Override public long getItemId ( int position ) { //注意此处记得修改 return position; } @ Override public View getView ( int position , View convertView , ViewGroup parent ) { ImageView imageView ; if (convertView == null ) { imageView = new ImageView ( HeadActivity . this ); imageView . setAdjustViewBounds ( true ); imageView . setMaxWidth ( 158 ); imageView . setMaxHeight ( 150 ); imageView . setPadding ( 5 , 5 , 5 , 5 ); } else { imageView = (ImageView) convertView; } imageView . setImageResource (pics[position]); return imageView; } }; gridView . setAdapter (adapter); gridView . setOnItemClickListener ( new AdapterView. OnItemClickListener () { @ Override public void onItemClick ( AdapterView < ? > parent, View view, int position, long id) { Intent intent = getIntent (); Bundle bundle = new Bundle (); bundle . putInt ( "image" ,pics[position]); intent . putExtras (bundle); setResult ( 0x11 ,intent); finish (); } }); } }
使用 Fragment
Fragment 的生命周期
通俗理解:
如果我们把 Activity 比作成 鱼塘的水 ,那么 Fragment 就相当于 鱼塘中的鱼 。当鱼塘干涸时,鱼也就死掉了;当 Activity 暂停时,里面的所有 Fragment 也会被暂停;当 Activity 被销毁时,它里面的所有 Fragment 也会被销毁。只有当 Activity 正在运行时,我们才能对里面的 Fragment 进行操作。
返回栈:一组 Activity 的集合,在这里面按照先进后出的原则(栈)放置了一系列 Activity。当我们进行 Fragment 的转换的时候,我们可以把 Fragment 放入到 Activity 的返回栈中。
创建 Fragment
extends Fragment
通过继承 Fragment 即可,也可以通过继承一个已经存在的 Fragment 子类。
新建一个布局文件:fragment_list.xml
1
2
3
4
5
6
7
8
9
<? xml version = "1.0" encoding = "utf-8" ?> < LinearLayout xmlns:android = "http://schemas.android.com/apk/res/android" android:orientation = "vertical" android:layout_width = "match_parent" android:layout_height = "match_parent" > < TextView android:layout_width = "match_parent" android:layout_height = "match_parent" android:text = " Fragment content" /> </ LinearLayout >
在包下新建一个 Java 类:FragmentList.java
继承 Fragment,并重写 onCreateView。
1
2
3
4
5
6
7
8
public class ListFragment extends Fragment { @ Nullable @ Override public View onCreateView (@ NonNull LayoutInflater inflater , @ Nullable ViewGroup container , @ Nullable Bundle savedInstanceState ) { View view = inflater . inflate ( R . layout . fragment_list , container, false ); return view; } }
在 Activity 中添加 Fragment
直接在布局文件中添加Fragment。
创建两个布局文件:fragment_list.xml,fragment_detail.xml
1
2
3
4
5
6
7
8
9
10
11
12
13
<? xml version = "1.0" encoding = "utf-8" ?> < LinearLayout xmlns:android = "http://schemas.android.com/apk/res/android" android:layout_width = "match_parent" android:layout_height = "match_parent" android:padding = "10dp" android:orientation = "vertical" > < TextView android:layout_width = "wrap_content" android:layout_height = "wrap_content" android:textSize = "20dp" android:text = " List Fragment" /> </ LinearLayout >
1
2
3
4
5
6
7
8
9
10
11
<? xml version = "1.0" encoding = "utf-8" ?> < LinearLayout xmlns:android = "http://schemas.android.com/apk/res/android" android:padding = "10dp" android:layout_width = "match_parent" android:layout_height = "match_parent" > < TextView android:layout_width = "wrap_content" android:layout_height = "wrap_content" android:text = "Detail Fragment" android:textSize = "20dp" /> </ LinearLayout >
两个布局文件对应的 Activity:ListFragment.java,DetailFragment.xml 继承 Fragment,并重写 onCreateView。
1
2
3
4
5
6
7
8
public class ListFragment extends Fragment { @ Nullable @ Override public View onCreateView (@ NonNull LayoutInflater inflater , @ Nullable ViewGroup container , @ Nullable Bundle savedInstanceState ) { View view = inflater . inflate ( R . layout . fragment_list , container, false ); return view; } }
1
2
3
4
5
6
7
8
9
public class DetailFragment extends Fragment { @ Nullable @ Override public View onCreateView (@ NonNull LayoutInflater inflater , @ Nullable ViewGroup container , @ Nullable Bundle savedInstanceState ) { View view = inflater . inflate ( R . layout . fragment_detail ,container, false ); return view; } }
activity_main.xml:
1
2
3
4
5
6
7
8
9
10
11
12
13
14
15
16
17
18
19
20
21
22
23
24
25
<? xml version = "1.0" encoding = "utf-8" ?> < LinearLayout xmlns:android = "http://schemas.android.com/apk/res/android" xmlns:app = "http://schemas.android.com/apk/res-auto" xmlns:tools = "http://schemas.android.com/tools" android:layout_width = "match_parent" android:layout_height = "match_parent" android:paddingStart = "16dp" android:paddingEnd = "16dp" android:paddingTop = "16dp" android:paddingBottom = "16dp" android:orientation = "horizontal" tools:context = ".MainActivity" > < fragment android:layout_width = "wrap_content" android:layout_height = "match_parent" android:name = "com.yang.fragment.ListFragment" android:id = "@+id/list" android:layout_weight = "1" /> < fragment android:layout_width = "wrap_content" android:layout_height = "match_parent" android:name = "com.yang.fragment.DetailFragment" android:id = "@+id/detail" android:layout_weight = "2" /> </ LinearLayout >
当Activity运行时添加Fragment
利用 上述代码,不修改两个布局文件(fragment_list.xml,fragment_detail.xml)。
修改 activity_main.xml:
1
2
3
4
5
6
7
8
9
10
< LinearLayout > < TextView android:layout_width = "wrap_content" android:layout_height = "wrap_content" android:text = "Activity" /> < FrameLayout android:layout_width = "wrap_content" android:layout_height = "wrap_content" android:id = "@+id/fl" ></ FrameLayout > </ LinearLayout >
MainActivity.java:
1
2
3
4
5
6
7
8
9
10
11
public class MainActivity extends AppCompatActivity { @ Override protected void onCreate ( Bundle savedInstanceState ) { super . onCreate (savedInstanceState); setContentView ( R . layout . activity_main ); DetailFragment detailFragment = new DetailFragment (); FragmentTransaction fragmentTransaction = getSupportFragmentManager (). beginTransaction (); fragmentTransaction . add ( R . id . fl ,detailFragment); fragmentTransaction . commit (); } }
实现 Tab 标签切换功能
在本次案例中,使用 Fragment 实现 Tab 标签的切换功能。
我们需要准备三个图标资源:主页、地图、我
我们先设置三个标签对应的页面,我们使用文本框来代替:
app_fragment.xml、map_fragment.xml、mine_fragment.xml:
1
2
3
4
5
6
7
8
< RelativeLayout xmlns:android = "http://schemas.android.com/apk/res/android" android:layout_width = "match_parent" android:layout_height = "match_parent" > < TextView android:layout_width = "match_parent" android:layout_height = "match_parent" android:text = "App Fragment" /> </ RelativeLayout >
1
2
3
4
5
6
7
8
9
< RelativeLayout xmlns:android = "http://schemas.android.com/apk/res/android" android:padding = "30dp" android:layout_width = "match_parent" android:layout_height = "match_parent" > < TextView android:layout_width = "match_parent" android:layout_height = "match_parent" android:text = "Map Fragment" /> </ RelativeLayout >
1
2
3
4
5
6
7
8
9
< RelativeLayout xmlns:android = "http://schemas.android.com/apk/res/android" android:padding = "30dp" android:layout_width = "match_parent" android:layout_height = "match_parent" > < TextView android:layout_width = "match_parent" android:layout_height = "match_parent" android:text = "Mine Fragment" /> </ RelativeLayout >
然后我们需要创建页面对应的Fragment:
我们在此仅贴出一个,其他两个修改 inflater.inflate() 的参数即可。
1
2
3
4
5
6
7
8
public class MapFragment extends Fragment { @ Nullable @ Override public View onCreateView (@ NonNull LayoutInflater inflater , @ Nullable ViewGroup container , @ Nullable Bundle savedInstanceState ) { View view = inflater . inflate ( R . layout . map_fragment , null ); return view; } }
在activity_app.xml中添加Fragment标记和标签栏:
1
2
3
4
5
6
7
8
9
10
11
12
13
14
15
16
17
18
19
20
21
22
23
24
25
26
27
28
29
30
31
32
< RelativeLayout > < fragment android:id = "@+id/fragment" android:layout_width = "match_parent" android:layout_height = "match_parent" android:name = "com.yang.tabfragment.AppFragment" /> < LinearLayout android:layout_width = "match_parent" android:layout_height = "50dp" android:layout_alignParentBottom = "true" android:orientation = "horizontal" > < ImageView android:id = "@+id/home" android:layout_width = "0dp" android:layout_height = "50dp" android:layout_weight = "1" android:src = "@drawable/home" /> < ImageView android:id = "@+id/map" android:layout_width = "0dp" android:layout_height = "50dp" android:layout_weight = "1" android:src = "@drawable/map" /> < ImageView android:id = "@+id/mine" android:layout_width = "0dp" android:layout_height = "50dp" android:layout_weight = "1" android:src = "@drawable/mine" /> </ LinearLayout > </ RelativeLayout >
最后编写MainActivity.java:
1
2
3
4
5
6
7
8
9
10
11
12
13
14
15
16
17
18
19
20
21
22
23
24
25
26
27
28
29
30
31
32
33
34
35
36
public class MainActivity extends FragmentActivity { @ Override protected void onCreate ( Bundle savedInstanceState ) { super . onCreate (savedInstanceState); setContentView ( R . layout . activity_main ); ImageView home = findViewById ( R . id . home ); ImageView map = findViewById ( R . id . map ); ImageView mine = findViewById ( R . id . mine ); //设置监听器 home . setOnClickListener (l); map . setOnClickListener (l); mine . setOnClickListener (l); } View . OnClickListener l = new View . OnClickListener () { @ Override public void onClick ( View v) { FragmentManager fragmentManager = getSupportFragmentManager () ; FragmentTransaction fragmentTransaction = fragmentManager . beginTransaction (); Fragment fragment = null ; switch ( v . getId () ){ case R . id . home : fragment = new AppFragment () ; break ; case R . id . map : fragment = new MapFragment () ; break ; case R . id . mine : fragment = new MineFragment () ; break ; default:break ; } fragmentTransaction . replace ( R . id . fragment ,fragment); fragmentTransaction . commit (); } } ; }
应用核心 Intent
初始 Intent
中文翻译:n. 意图、目的
概括 Intent
我们在 Android 应用程序中需要用到三种组件:Activity 、Service 、BroadcastReceiver 。这三个组件是独立的,但他们可以相互调用、协调工作,最终组成一个完整的安卓应用。
Intent 是 Android 中的一个用于组件间互相通信的信息对象,常用于启动组件和传递数据。Intent 最重要的就是其包含的信息。Intent 发出的时候,系统对应的行为正是由 Intent 所包含 信息的组合 决定。一个 Intent 所包含的信息如下图:
通俗理解: 假设我们是安卓三种组件中的一种,商家是安卓三种组件中的另外一种,我们需要在商家处购买货物,货物就相当于是 Bundle,而运送获取的快递员就相当于是 Intent。Intent 起到了信使的作用。
Intent 工作过程
假设有两个 Activity,分别取名为 ListActivity 和 DetailActivity,要实现 ListActivity 跳转到 DetailActivity:
Intent 基本应用
通过 Intent 可以开启另一个 Activity(比如用户登录成功后跳转至主页);
通过 Intent 可以开启一个 Service(比如点击下载按钮后下载某种文件、应用);
用来传递广播。
Intent 对象的属性
Intent 对象的属性包括:Component name 、Action 、Data 、Category 、Extras ,Flags 。
可以参考上文中 概述Intent 中的图。
Component name
用于设置 Intent 对象的组件名称。通过设置 Component name 可以启动其他的 Activity,或者其他应用中的 Activity。我们可以通过指定包名和类名来确定唯一一个 Activity。
在此我们可以使用 setComponent()。
activity_main.xml
1
2
3
4
5
< Button android:id = "@+id/button" android:layout_width = "wrap_content" android:layout_height = "wrap_content" android:text = "查看详细" />
activity_detail.xml
1
2
3
4
< TextView android:layout_width = "wrap_content" android:layout_height = "wrap_content" android:text = "详细内容" />
DetailActivity.java:
1
2
3
4
5
6
7
8
9
10
11
12
13
14
15
16
17
public class MainActivity extends AppCompatActivity { @ Override protected void onCreate ( Bundle savedInstanceState ) { super . onCreate (savedInstanceState); setContentView ( R . layout . activity_main ); Button button = findViewById ( R . id . button ); button . setOnClickListener ( new View. OnClickListener () { @ Override public void onClick ( View v) { Intent intent = new Intent (); ComponentName componentName = new ComponentName ( "com.yang.component_name" , "com.yang.component_name.DetailActivity" ); intent . setComponent (componentName); startActivity (intent); } }); } }
Action和Data
Action 用来指定将要执行的动作,Data 用来指定具体的数据。通常情况下,两者需要一起使用。
Action 属性可以通过 Intent 定义的 Action 常量 来设置,具体我们可以查看 SDK API 文档。
常量参考链接: 点击查看1 点击查看2
1
2
3
4
5
6
7
8
9
10
11
12
13
14
15
16
17
18
19
20
21
★intent action大全★ ACTION_MAIN 作为一个主要的进入口,而并不期望去接受数据 ACTION_VIEW 向用户去显示数据 ACTION_ATTACH_DATA 用于指定一些数据应该附属于一些其他的地方,例如,图片数据应该附属于联系人 ACTION_EDIT 访问已给的数据,提供明确的可编辑 ACTION_PICK 从数据中选择一个子项目,并返回你所选中的项目 ACTION_CHOOSER 显示一个activity选择器,允许用户在进程之前选择他们想要的 ACTION_GET_CONTENT 允许用户选择特殊种类的数据,并返回(特殊种类的数据:照一张相片或录一段音) ACTION_DIAL 拨打一个指定的号码,显示一个带有号码的用户界面,允许用户去启动呼叫 ACTION_CALL 根据指定的数据执行一次呼叫(ACTION_CALL在应用中启动一次呼叫有缺陷,多数应用ACTION_DIAL,ACTION_CALL不能用在紧急呼叫上,紧急呼叫可以用ACTION_DIAL来实现) ACTION_SEND 传递数据,被传送的数据没有指定,接收的action请求用户发数据 ACTION_SENDTO 发送一跳信息到指定的某人 ACTION_ANSWER 处理一个打进电话呼叫 ACTION_INSERT 插入一条空项目到已给的容器 ACTION_DELETE 从容器中删除已给的数据 ACTION_RUN 运行数据,运行维护 ACTION_SYNC 同步执行一个数据 ACTION_PICK_ACTIVITY 为已知的Intent选择一个Activity,返回选中的类 ACTION_SEARCH 执行一次搜索 ACTION_WEB_SEARCH 执行一次web搜索 ACTION_FACTORY_TEST 工场测试的主要进入点
Data 属性是一个 URI 对象,通常情况下,它包括数据的 URI 和 MIME 类型,不同的 Action 有不同的数据规格。比如:Action 字段 > Data 字段
案例:使用Intent实现拨打电话和发送短信功能
activity_main.xml
1
2
3
4
5
6
7
8
9
10
11
12
13
14
15
16
17
18
19
20
21
22
23
24
25
26
27
< RelativeLayout > < TextView android:id = "@+id/text" android:layout_width = "wrap_content" android:layout_height = "wrap_content" android:text = "请选择你需要的功能:" /> < ImageButton android:id = "@+id/imageButton_phone" android:layout_width = "wrap_content" android:layout_height = "wrap_content" android:src = "@drawable/phone" android:layout_below = "@+id/text" android:layout_marginTop = "30dp" android:background = "#0000" android:scaleType = "fitXY" /> < ImageButton android:id = "@+id/imageButton_sms" android:layout_width = "wrap_content" android:layout_height = "wrap_content" android:src = "@drawable/sms" android:layout_toRightOf = "@+id/imageButton_phone" android:layout_below = "@+id/text" android:layout_marginTop = "30dp" android:layout_marginLeft = "30dp" android:background = "#0000" android:scaleType = "fitXY" /> </ RelativeLayout >
MainActivity.java:
1
2
3
4
5
6
7
8
9
10
11
12
13
14
15
16
17
18
19
20
21
22
23
24
25
26
27
28
29
30
31
32
public class MainActivity extends AppCompatActivity { @ Override protected void onCreate ( Bundle savedInstanceState ) { super . onCreate (savedInstanceState); setContentView ( R . layout . activity_main ); ImageButton imageButton = findViewById ( R . id . imageButton_phone ); ImageButton imageButton1 = findViewById ( R . id . imageButton_sms ); imageButton . setOnClickListener (l); imageButton1 . setOnClickListener (l); } View . OnClickListener l = new View . OnClickListener () { @ Override public void onClick ( View v) { Intent intent = new Intent () ; ImageButton imageButton = (ImageButton)v ; switch ( imageButton . getId () ){ case R . id . imageButton_phone : intent . setAction ( intent . ACTION_DIAL ); intent . setData ( Uri . parse ( "tel:10086" )); startActivity (intent) ; break ; case R . id . imageButton_sms : intent . setAction ( intent . ACTION_SENDTO ); intent . setData ( Uri . parse ( "smsto:10086" )); intent . putExtra ( "sms_body" , "CXLL" ); startActivity (intent) ; break ; } } } ; }
因为要打电话和发短信,需要在 AndroidManifest.xml 中开启权限。
AndroidManifest.xml:
1
2
3
4
5
< manifest > < uses-permission android:name = "android.permission.CALL_PHONE" /> < uses-permission android:name = "android.permission.SEND_SMS" /> ... </ manifest >
Action和Category
Action 属性的使用方法与上一条一样。
Category 属性:对执行动作的类别进行描述,在使用这个属性时,可以使用 Intent 提供的 Category 常量 来设置,具体我们可以查看 SDK API 文档。
参考链接:参考链接1
Category 常量
常量对应字符串
简单说明
CATEGORY_DEFAULT
android.intent.category.DEFAULT
默认的 Category
CATEGORY_BROWSABLE
android.intent.category.BROWSABLE
指定该 Activity 能被浏览器安全调用
CATEGORY_TAB
android.intent.category.TAB
指定 Activity 作为 TabActivity 的 Tab 页
CATEGORY_LAUNCHER
android.intent.category.LAUNCHER
Activity 显示顶级程序列表中(设置程序主入口)
CATEGORY_INFO
android.intent.category.INFO
用于提供包信息
CATEGORY_HOME
android.intent.category.HOME
设置该 Activity 随系统启动而运行(返回系统桌面)
CATEGORY_PREFERENCE
android.intent.category.PREFERENCE
该 Activity 是参数面板
CATEGORY_TEST
android.intent.category.TEST
该 Activity 是一个测试
CATEGORY_CAR_DOCK
android.intent.category.CAR_DOCK
指定手机被插入汽车底座(硬件)时运行该 Activity
CATEGORY_DESK_DOCK
android.intent.category.DESK_DOCK
指定手机被插入桌面底座(硬件)时运行该 Activity
CATEGORY_CAR_MODE
android.intent.category.CAR_MODE
设置该 Activity 可在车载环境下使用
案例:实现单击按钮关闭界面回到系统桌面
activity_main.xml:
1
2
3
4
5
6
7
8
9
< LinearLayout > < Button android:id = "@+id/button1" android:layout_width = "wrap_content" android:layout_height = "wrap_content" android:layout_marginTop = "70dp" android:layout_marginStart = "60dp" android:text = "关闭界面" /> </ LinearLayout >
MainActivity.java:
1
2
3
4
5
6
7
8
9
10
11
12
13
14
15
16
17
public class MainActivity extends AppCompatActivity { @ Override protected void onCreate ( Bundle savedInstanceState ) { super . onCreate (savedInstanceState); setContentView ( R . layout . activity_main ); Button button = findViewById ( R . id . button1 ); button . setOnClickListener ( new View. OnClickListener () { @ Override public void onClick ( View v) { Intent intent = new Intent (); intent . setAction ( intent . ACTION_MAIN ); intent . addCategory ( intent . CATEGORY_HOME ); startActivity (intent); } }); } }
Extras属性
主要用于向 Intent 组件中添加附加信息。通常情况下,这些附加信息由键值对的形式来保存。
在 Intent 对象中提供了 putExtras() 方法,用于把 Bundle 对象作为附加数据来进行添加。如果我们要获取保存在 Bundle 对象中的信息,可以使用 getExtras() 方法来获取。
Bundle 对象传递数据需要数据小于 0.5 MB,否则会报 OOM(Out Of Memory)错误。
这个属性常 用于在多个Activity进行数据交换 时。
Flags 属性
作用:指示安卓程序应该如何启动另一个 Activity,指示程序启动以后如何处理。
在使用这个属性时,可以使用 Intent 提供的 Flags 常量 来设置,具体我们可以查看 SDK API 文档。
在此附上三个参考链接以供查看: 参考链接1 参考链接2 参考链接3
案例:Intent.FLAG_ACTIVITY_NO_HISTORY 的使用
activity_main.xml:
1
2
3
4
5
< Button android:id = "@+id/button" android:layout_width = "wrap_content" android:layout_height = "wrap_content" android:text = "查看详情" />
activity_detail.xml:
1
2
3
4
< TextView android:layout_width = "wrap_content" android:layout_height = "wrap_content" android:text = "详情内容" />
MainActivity.java:
1
2
3
4
5
6
7
8
9
10
11
12
13
14
15
16
17
public class MainActivity extends AppCompatActivity { @ Override protected void onCreate ( Bundle savedInstanceState ) { super . onCreate (savedInstanceState); setContentView ( R . layout . activity_main ); Button button = findViewById ( R . id . button ); button . setOnClickListener ( new View. OnClickListener () { @ Override public void onClick ( View v) { Intent intent = new Intent ( MainActivity . this , DetailActivity . class ); //让我们当前的Activity不在历史栈中保留 intent . setFlags ( Intent . FLAG_ACTIVITY_NO_HISTORY ); startActivity (intent); } }); } }
运行结果:
如果 不使用 FLAG_ACTIVITY_NO_HISTORY,当我们点击「查看详情」按钮后,界面会跳转到 activity_detail界面,并显示内容:“详情内容”。此时我们不停止当前程序,然后返回至系统桌面,再在后台找到该项目并进入该项目,进去后我们会发现 当前界面依旧在activity_detail 界面 。
如果 使用 FLAG_ACTIVITY_NO_HISTORY,当我们点击「查看详情」按钮后,界面会跳转到 activity_detail 界面,并显示内容:「详情内容」。此时我们不停止当前程序,然后返回至系统桌面,再在后台找到该项目并进入该项目,进去后我们会发现 当前界面已经返回至程序入口界面 。
Intent 种类
Intent 种类分为两种:显式Intent 和 隐式Intent 。
显式 Intent
含义 :我们在创建 Intent 对象时,直接指定目标组件(Activity、Service、BroadcastReceiver)名称就可以启动目标组件。我们明确知道要启动的 Activity 或 Service 类的名称时就使用显式 Intent。
创建显式 Intent 对象的语法格式如下:
1 Intent intent = new Intent ( Context packageContext , Class < ? > cls) ;
其中:
packageContext 为上下文对象,如:MainActivity.this
cls 为要启动的 Activity 的类,如:DetailActivity.class
隐式 Intent
含义 :我们在创建 Intent 对象时,不指定目标组件,而是定义 action、category 或 data,让 Android 系统根据设置好的匹配规则找到目标组件。使用隐式 Intent 时,我们通常需要给 Intent 对象定义 action、category 或 data 属性。
案例:使用隐式Intent打开哔哩哔哩
activity_main.xml:
1
2
3
4
5
< Button android:id = "@+id/button" android:layout_width = "wrap_content" android:layout_height = "wrap_content" android:text = "打开哔哩哔哩" />
MainActivity.java:
1
2
3
4
5
6
7
8
9
10
11
12
13
14
15
16
17
public class MainActivity extends AppCompatActivity { @ Override protected void onCreate ( Bundle savedInstanceState ) { super . onCreate (savedInstanceState); setContentView ( R . layout . activity_main ); Button button = findViewById ( R . id . button ); button . setOnClickListener ( new View. OnClickListener () { @ Override public void onClick ( View v) { Intent intent = new Intent (); intent . setAction ( intent . ACTION_VIEW ); intent . setData ( Uri . parse ( "http://www.bilibili.com" )); startActivity (intent); } }); } }
显式 Intent 和隐式 Intent 的区别:
显式 Intent
隐式 Intent
直接指定目标组件的名称
不会用组件名称定义要激活的目标组件
多用于在应用程序内部传递信息
多用于在不同应用之间传递信息
Intent 过滤器
主要应用在使用隐式Intent来启动Activity时。
隐式启动 Activity 时,并没有在 Intent 中指明 Acitivity 所在的类,因此,Android 系统一定存在某种匹配机制,使 Android 系统能够根据 Intent 中的数据信息,找到需要启动的 Activity。这种匹配机制是依靠 Android 系统中的 Intent 过滤器(Intent Filter)来实现的。
Intent 过滤器是一种根据 Intent 中的动作(action)、类别(category)和数据(data)等内容,对适合接收该 Intent 的组件进行匹配和筛选的机制。Intent 过滤器可以匹配数据类型、路径和协议,还可以确定多个匹配项顺序的优先级(priority)。应用程序的 Activity、Service 和 BroadcastReceiver 组件都可以注册 Intent 过滤器。这样,这些组件在特定的数据格式上则可以产生相应的动作。
为了使组件能够注册 Intent 过滤器,通常在 AndroidManifest.xml 的各个组件下定义 < intent-filter > 节点,然后再< intent-filter >节点中声明该组件所支持的动作、执行的环境和数据格式等信息。当然,也可以在程序代码中动态的为组件设置 Intent 过滤器。 < intent-filter >节点支持< action >标签、 < category >标签 和 < data >标签,分别用来定义 Intent 过滤器的动作、类型和数据。
参考链接:参考链接
常用的标签:
在 Activity 中使用包含定义动作的隐式 Intent 启动另外一个 Activity
案例概述:主入口有一张尺寸较小的图片,点击下方的「查看大图」后,弹出选择框,选择后进入页面查看大图。因此本案例需要首先准备一张图片。
activity_main.xml:
1
2
3
4
5
6
7
8
9
10
11
12
13
14
15
< RelativeLayout > < ImageView android:id = "@+id/image" android:layout_width = "200dp" android:layout_height = "200dp" android:layout_centerInParent = "true" android:src = "@drawable/image" /> < Button android:id = "@+id/button" android:layout_width = "wrap_content" android:layout_height = "wrap_content" android:layout_below = "@+id/image" android:layout_centerInParent = "true" android:text = "查看大图" /> </ RelativeLayout >
activity_show.xml:
1
2
3
4
< ImageView android:layout_width = "wrap_content" android:layout_height = "wrap_content" android:src = "@drawable/image" />
MainActivity.java:
1
2
3
4
5
6
7
8
9
10
11
12
13
14
15
16
public class MainActivity extends AppCompatActivity { @ Override protected void onCreate ( Bundle savedInstanceState ) { super . onCreate (savedInstanceState); setContentView ( R . layout . activity_main ); Button button = findViewById ( R . id . button ); button . setOnClickListener ( new View. OnClickListener () { @ Override public void onClick ( View v) { Intent intent = new Intent (); intent . setAction ( intent . ACTION_VIEW ); startActivity (intent); } }); } }
最后需要进入 AndroidManifest.xml 文件进行配置:
1
2
3
4
5
6
< activity android:name = ".ShowActivity" > < intent-filter > < action android:name = "android.intent.action.VIEW" /> < category android:name = "android.intent.category.DEFAULT" /> </ intent-filter > </ activity >
Android 程序调试
DDMS 工具使用
Android 开发管径提供的调试工具,可以查看到指定进程运行时的线程信息、内存信息、内存分配、
为测试设备截屏、查看 Log Cat 日志等等。
谷歌正慢慢将 DDMS 抛弃!
打开 DDMS
在 Android Studio 中打开;
独立打开(在 SDK 目录下的可执行程序,在 Android 10 SDK 目录下无该可执行程序)。
打开 DDMS 之前,我们需要在 Android Studio 中打开模拟器。
Android Studio 升级到 3.0 以后,使用 Android Profiler 替代了 DDMS。
输出日志信息
Log 类
结构:
继承 java.lang.Object
Log 类提供的方法
方法
作用
日志颜色
Log.v(String tag,String msg)
输出冗余信息
黑色 - VERBOSE
Log.d(String tag,String msg)
输出调试信息
蓝色 - DEBUG
Log.i(String tag,String msg)
输出普通信息
绿色 - INFO
Log.w(String tag,String msg)
输出警告信息
橙色 - WARN
Log.e(String tag,String msg)
输出错误信息
红色 - ERROR
日志级别从低到高。
案例:测试输出日志信息
activity_main.xml:
1
2
3
4
5
6
7
8
< RelativeLayout > < ImageView android:id = "@+id/image" android:layout_width = "200dp" android:layout_height = "200dp" android:layout_centerInParent = "true" android:src = "@drawable/image" /> </ RelativeLayout >
MainActivity.java:
1
2
3
4
5
6
7
8
9
10
11
12
13
public class MainActivity extends AppCompatActivity { private static String TAG = "MainActivity:" ; @ Override protected void onCreate ( Bundle savedInstanceState ) { super . onCreate (savedInstanceState); setContentView ( R . layout . activity_main ); Log . e (TAG, "MR输出的【错误信息】" ); Log . w (TAG, "MR输出的【警告信息】" ); Log . i (TAG, "MR输出的【普通信息】" ); Log . d (TAG, "MR输出的【调试信息】" ); Log . v (TAG, "MR输出的【冗余信息】" ); } }
输出结果:
日志级别过滤器可以输出 比选中级别高 的日志信息。
程序调试
使用 Android Studio 编译器调试
使用 Android Studio 编写代码时,使用 ALT + ENTER 快捷键可以快速修正代码。
其他 AS 使用操作与 IDEA 一样,毕竟 AS 是基于 Intellij IDEA 的,在此不再累述。
使用 Android Studio 调试器调试
使用断点的方式进行调试,设置好断点后,使用 Debug 运行。
Debug调试按钮:
Step Over: 单步跳过,运行单独的一行程序代码,但是不进入调用这个方法的内部。如果方法中有断点,则会在断点处停止。
Step Into:单步跳入,跳入到调用方法或者对象的内部单步执行程序。
Force Step Into:强制单步跳入,跳入所有被调入的方法。
Step Out:单步跳出,跳出当前执行或跳入的方法。
Run to Cursor:运行到下一个断点,如果程序中没有断点或出现异常,程序直接运行到结束。
Evaluate Expression:计算表达式。可以输入某些变量名,然后进行计算。
Variables(变量面板):
在变量面板修改某个变量的值:右击选中变量 > Set Value > 输入修改的值并回车以完成修改。
Android 事件处理和手势
事件处理概述
基于监听的事件处理
做法:
为安卓的 UI 组件绑定特定的事件监听器。比如:为按钮绑定单击事件监听器。
三类对象:
事件监听器(Event Listener):监听事件源发生的事件,并对不用的事件作出相应的响应。
事件源(Event Source):事件产生的来源。一般情况下指各种组件,比如说窗口、按钮、菜单等。
事件(Event):封装了 UI 组件上发生的特定事件的具体信息。
处理流程:
基于回调的事件处理
做法:
重写 Android 组件特定的回调方法或重写 Activity 的回调方法。
回调方法:当某个事件发生时所调用的方法。
重写的方法:
通常重写 onTouchEvent()、onKeyDown()、onKeyUp() 这三个方法。
重写的三种方法演示:
activity_main.xml 使用默认的即可。
MainActivity.java:
1
2
3
4
5
6
7
8
9
10
11
12
13
14
15
16
17
18
19
20
21
22
23
24
25
26
public class MainActivity extends AppCompatActivity { @ Override protected void onCreate ( Bundle savedInstanceState ) { super . onCreate (savedInstanceState); setContentView ( R . layout . activity_main ); } @ Override public boolean onTouchEvent ( MotionEvent event ) { Toast . makeText ( MainActivity . this , "触摸" , Toast . LENGTH_SHORT ). show (); return super . onTouchEvent (event); } @ Override public boolean onKeyDown ( int keyCode , KeyEvent event ) { Toast . makeText ( MainActivity . this , "按下" , Toast . LENGTH_SHORT ). show (); return super . onKeyDown (keyCode, event); } @ Override public boolean onKeyUp ( int keyCode , KeyEvent event ) { Toast . makeText ( MainActivity . this , "抬起" , Toast . LENGTH_SHORT ). show (); return super . onKeyUp (keyCode, event); } }
测试方法: 运行后点击屏幕任意空白处可以测试「触摸」,调节音量可以测试「按下」和「抬起」。
区别
对于 通用性 的事件采用基于 回调 的事件处理方式。
对于 某些特定的 事件采用基于 监听 的事件处理方式。
物理按键事件处理
物理按键:手机上真实存在的按键。
按键状态:
安卓为每一个物理按键都提供了三个方法,分别是:
按下,但没有松开:onKeyDown()
抬起,松开某个按键:onKeyUp()
长按,长按某个按键:onKeyLongPress()
物理按键常量:
音量键:KEYCODE_VOLUME_UP 和 KEYCODE_VOLUME_DOWM
电源键:KEYCODE_POWER
返回键:KEYCODE_BACK
主屏键:KEYCODE_HOME
菜单键:KEYCODE_MENU
双击返回键退出应用
本质是两秒内点击两次返回键退出应用。
activity_main.xml 使用默认文件。
MainActivity.java:
1
2
3
4
5
6
7
8
9
10
11
12
13
14
15
16
17
18
19
20
21
22
23
24
25
26
27
28
29
//继承Activity不让界面显示ActionBar public class MainActivity extends Activity { private long exitTime = 0 ; @ Override protected void onCreate ( Bundle savedInstanceState ) { super . onCreate (savedInstanceState); setContentView ( R . layout . activity_main ); } //1. 重写onKeyDown()方法来拦截用户单击后退按钮事件 @ Override public boolean onKeyDown ( int keyCode , KeyEvent event ) { if (keyCode == KeyEvent . KEYCODE_BACK ){ exit (); return false ; } return super . onKeyDown (keyCode, event); } //2. 创建退出方法exit() public void exit (){ //判断两次按下返回键的时间差 if (( System . currentTimeMillis () - exitTime > 2000 )){ Toast . makeText ( MainActivity . this , "再按一次退出程序" , Toast . LENGTH_SHORT ). show (); exitTime = System . currentTimeMillis (); } else { finish (); System . exit ( 0 ); } } }
触摸屏事件处理
单击事件
为主键设置单击事件监听器:setOnClickListener(View.OnClickListener)
setOnClickListener():
1
2
3
public static interface View .OnClickListener { public void onClick ( View v ); }
正因如此,我们在以前为按钮设置单击事件监听器时需要重写 onClick() 方法。
长按事件
长按事件需要 长按2秒以上才会触发 。
setOnLongClickListener(View.OnLongClickListener) 为组件设置长按事件监听器。
1
2
3
public static interface View .OnLongClickListener { public boolean onLongClick ( View v ); }
我们创建长按事件监听器时需要重写 onLongClick() 方法。
长按图片,弹出 收藏/举报 菜单
activity_main.xml:
1
2
3
4
5
6
7
< LinearLayout android:gravity = "center" > < ImageView android:id = "@+id/image" android:layout_width = "250dp" android:layout_height = "250dp" android:src = "@drawable/image" /> </ LinearLayout >
MainActivity.java:
1
2
3
4
5
6
7
8
9
10
11
12
13
14
15
16
17
18
19
20
21
22
23
24
25
26
public class MainActivity extends AppCompatActivity { @ Override protected void onCreate ( Bundle savedInstanceState ) { super . onCreate (savedInstanceState); setContentView ( R . layout . activity_main ); //2. 将长按事件注册到菜单中,并打开菜单 ImageView imageView = findViewById ( R . id . image ); imageView . setOnLongClickListener ( new View. OnLongClickListener () { @ Override public boolean onLongClick ( View v) { registerForContextMenu (v); openContextMenu (v); return true ; } }); } // 1. 在MainActivity中重写onCreateContextMenu菜单,为菜单添加选项值 @ Override public void onCreateContextMenu ( ContextMenu menu , View v , ContextMenu . ContextMenuInfo menuInfo ) { super . onCreateContextMenu (menu, v, menuInfo); menu . add ( "收藏" ); menu . add ( "举报" ); } }
触摸事件
setOntouchListener(View.OnTouchListener) 为组件设置触摸事件监听器
1
2
3
public interface View .OnTouchListener { public abstract boolean onTouch ( View v , MotionEvent event ); }
我们创建触摸事件监听器时需要重写 onTouch() 方法。
MotionEvent:保存发生触摸的位置、事件等细节信息。
实现帽子的拖动
我们需要先准备一个帽子的图片资源。
activity_main.xml:
1
2
3
4
5
6
7
8
< RelativeLayout xmlns:android = "http://schemas.android.com/apk/res/android" xmlns:app = "http://schemas.android.com/apk/res-auto" xmlns:tools = "http://schemas.android.com/tools" android:id = "@+id/relative" android:layout_width = "match_parent" android:layout_height = "match_parent" tools:context = ".MainActivity" > </ RelativeLayout >
新建一个 Java 类,取名为 HatView.java 用于指定帽子的位置和绘制帽子:
1
2
3
4
5
6
7
8
9
10
11
12
13
14
15
16
17
18
19
20
21
22
// 1. 创建自定义View,绘制帽子 public class HatView extends View { public float bitmapX ; public float bitmapY ; public HatView ( Context context ) { super (context); bitmapX = 65 ; bitmapY = 0 ; } @ Override protected void onDraw ( Canvas canvas ) { super . onDraw (canvas); Paint paint = new Paint (); Bitmap bitmap = BitmapFactory . decodeResource ( this . getResources (), R . drawable . hat ); canvas . drawBitmap (bitmap,bitmapX,bitmapY,paint); if ( ! bitmap . isRecycled ()){ bitmap . recycle (); } } }
MainActivity.java:
1
2
3
4
5
6
7
8
9
10
11
12
13
14
15
16
17
18
19
20
21
22
public class MainActivity extends AppCompatActivity { @ Override protected void onCreate ( Bundle savedInstanceState ) { super . onCreate (savedInstanceState); setContentView ( R . layout . activity_main ); // 2. 创建并实例化帽子类对象,并未帽子添加触摸事件监听器,在重写的触摸方法中根据触摸的位置重绘帽子 final HatView hat = new HatView ( MainActivity . this ); hat . setOnTouchListener ( new View. OnTouchListener () { @ Override public boolean onTouch ( View v, MotionEvent event) { hat . bitmapX = event . getX () - 80 ; hat . bitmapY = event . getY () - 80 ; hat . invalidate (); return true ; } }); // 3. 把帽子添加到布局管理器中 RelativeLayout rl = findViewById ( R . id . relative ); rl . addView (hat); } }
单击事件和触摸事件的区别
安卓应用在执行的时候 会先触发触摸事件 ,如果触摸事件没有完全消费掉事件,再触发单击事件 。
消费事件 :一次 UI 操作是否完成响应了,如果在重写的方法当中返回了 true,那么就表示完全消费了这个事件;如果返回的是 false,那么它会再交给后面的事件进行处理。
单击事件与触摸事件的区别案例
activity_main.xml:
1
2
3
4
5
< Button android:id = "@+id/btn" android:layout_width = "match_parent" android:layout_height = "50dp" android:text = "单击与触摸的区别" />
MainActivity.java:
1
2
3
4
5
6
7
8
9
10
11
12
13
14
15
16
17
18
19
20
21
22
23
24
25
26
27
public class MainActivity extends AppCompatActivity { @ Override protected void onCreate ( Bundle savedInstanceState ) { super . onCreate (savedInstanceState); setContentView ( R . layout . activity_main ); Button button = findViewById ( R . id . btn ); //1. 为按钮添加单击事件监听器 button . setOnClickListener ( new View. OnClickListener () { @ Override public void onClick ( View v) { Log . i ( "onClick" , "单击事件" ); } }); //2. 为按钮添加触摸事件监听器 button . setOnTouchListener ( new View. OnTouchListener () { @ Override public boolean onTouch ( View v, MotionEvent event) { if ( event . getAction () == MotionEvent . ACTION_DOWN ){ Log . i ( "onTouch" , "按下" ); } else if ( event . getAction () == MotionEvent . ACTION_UP ){ Log . i ( "onTouch" , "抬起" ); } return true ; } }); } }
编写好后,我们启动模拟器运行程序,打开 Logcat 观察日志输出结果:
此时重写的触摸事件方法返回值为 false ,点击按钮,日志输出结果为:
如果将重写的触摸事件方法返回值改为 true ,那么日志输出结果为:
结论:
单击事件触发一个动作,触摸事件触发两个动作。
安卓应用在执行的时候会先触发触摸事件,如果触摸事件没有完全消费掉事件,再触发单击事件。
手势检测
安卓为手势检测提供了 GestureDetector 类。
我们在创建这个类的对象的时候需要传入 GestureDetector.OnGestureListener 接口的实例,这个接口是个监听器,用来对用户的手势进行响应。
我们在实现 OnGestureListener 实例的时候,必须重写六个方法:
方法名
含义
onDown()
触摸事件按下时触发
onFling()
当用户的手指在屏幕上滑过一段距离时触发
onLongPress()
当用户的手指在屏幕上长按时触发
onScroll()
当用户的手指在屏幕上滑动时触发
onShowPress()
当用户的手指在屏幕上还没有滑动时触发
onSingleTapUp()
当用户的手指在屏幕上轻击时触发
实现滑动图片以切换图片
准备: 我们需要准备四张图片,取名为 image1 ~ image4,并将它们放置于 drawable 目录下。然后编写动画文件,并放置于 res/anim 下(anim 需要自行创建)。
动画文件:
向左推进:push_left_in.xml
1
2
3
4
5
6
7
<? xml version = "1.0" encoding = "utf-8" ?> < set xmlns:android = "http://schemas.android.com/apk/res/android" > < translate android:fromXDelta = "100%p" android:toXDelta = "0" android:duration = "500" /> < alpha android:fromAlpha = "0.1" android:toAlpha = "1.0" android:duration = "500" /> </ set >
向左推出:push_left_out.xml
1
2
3
4
5
6
7
<? xml version = "1.0" encoding = "utf-8" ?> < set xmlns:android = "http://schemas.android.com/apk/res/android" > < translate android:fromXDelta = "0" android:toXDelta = "-100%p" android:duration = "500" /> < alpha android:fromAlpha = "1.0" android:toAlpha = "0.1" android:duration = "500" /> </ set >
向右推进:push_right_in.xml
1
2
3
4
5
6
7
<? xml version = "1.0" encoding = "utf-8" ?> < set xmlns:android = "http://schemas.android.com/apk/res/android" > < translate android:fromXDelta = "-100%p" android:toXDelta = "0" android:duration = "500" /> < alpha android:fromAlpha = "0.1" android:toAlpha = "1.0" android:duration = "500" /> </ set >
向右推出:push_right_out.xml
1
2
3
4
5
6
7
<? xml version = "1.0" encoding = "utf-8" ?> < set xmlns:android = "http://schemas.android.com/apk/res/android" > < translate android:fromXDelta = "0" android:toXDelta = "100%p" android:duration = "500" /> < alpha android:fromAlpha = "1.0" android:toAlpha = "0.1" android:duration = "500" /> </ set >
activity_main.xml:
1
2
3
4
< ViewFlipper android:id = "@+id/flipper" android:layout_width = "match_parent" android:layout_height = "match_parent" ></ ViewFlipper >
ViewFlipper 使用动画来控制多个组件之间的切换效果的。
MainActivity.java:
1
2
3
4
5
6
7
8
9
10
11
12
13
14
15
16
17
18
19
20
21
22
23
24
25
26
27
28
29
30
31
32
33
34
35
36
37
38
39
40
41
42
43
44
45
46
47
48
49
50
51
52
53
54
55
56
57
58
59
60
61
62
63
64
65
66
67
68
//1. 让MainActivity实现GestureDetector.OnGestureListener接口,并实现其所有方法 public class MainActivity extends AppCompatActivity implements GestureDetector . OnGestureListener { Animation [] animations = new Animation [ 4 ] ; final int distance = 50 ; private int [] images = new int []{ R . drawable . image1 , R . drawable . image2 , R . drawable . image3 , R . drawable . image4 } ; ViewFlipper flipper ; // 2. 定义一个全局的手势检测器 GestureDetector detector ; @ Override protected void onCreate ( Bundle savedInstanceState ) { super . onCreate (savedInstanceState); setContentView ( R . layout . activity_main ); detector = new GestureDetector ( MainActivity . this , this ); //3. 将要显示的图片加载到ViewFlipper中,并初始化动画数组 flipper = findViewById ( R . id . flipper ); for ( int i = 0 ; i < images . length ; i++) { ImageView imageView = new ImageView ( this ); imageView . setImageResource (images[i]); flipper . addView (imageView); } animations[ 0 ] = AnimationUtils . loadAnimation ( this , R . anim . push_right_in ); animations[ 1 ] = AnimationUtils . loadAnimation ( this , R . anim . push_right_out ); animations[ 2 ] = AnimationUtils . loadAnimation ( this , R . anim . push_left_in ); animations[ 3 ] = AnimationUtils . loadAnimation ( this , R . anim . push_left_out ); } @ Override public boolean onDown ( MotionEvent e ) { return false ;} @ Override public void onShowPress ( MotionEvent e ) { } @ Override public boolean onSingleTapUp ( MotionEvent e ) { return false ;} @ Override public boolean onScroll ( MotionEvent e1 , MotionEvent e2 , float distanceX , float distanceY ) { return false ;} @ Override public void onLongPress ( MotionEvent e ) { } @ Override public boolean onFling ( MotionEvent e1 , MotionEvet e2 , float velocityX , float velocityY ) { //4. 在onFling()中通过触摸事件的X坐标判断是向左滑动还是向右滑动,并为其设置动画 //从右向左滑 if ( e1 . getX () - e2 . getX () > distance){ flipper . setInAnimation (animations[ 2 ]); flipper . setOutAnimation (animations[ 3 ]); flipper . showPrevious (); return true ; } else if ( e2 . getX () - e1 . getX () > distance){ flipper . setInAnimation (animations[ 0 ]); flipper . setOutAnimation (animations[ 1 ]); flipper . showNext (); return true ; } return false ; } //5. 将Activity上的触摸事件交给GestureDetector处理 @ Override public boolean onTouchEvent ( MotionEvent event ) { return detector . onTouchEvent (event); } }
手势的添加
我们可以自定义我们的手势,就像手写输入法可以识别我们手写的文字一样。
我们需要先创建手势文件,手势文件的创建需要用到一个 APP:GestureBuilder 。该软件可以在谷歌应用商店安装。(当然,进谷歌应用商店需要绿色上网,或者你也可以联系本文作者获取软件)
该软件在低版本的 Android Studio 中是内置的,但高版本似乎取消了这个软件。
注意:GestureBuilder 需要安装在我们自己的手机上,不是 Android Studio 的虚拟机上。
GestureBuilder 的使用很简单,在此就不再描述其使用方法。
手势文件的位置
我们用 GestureBuilder 创建好我们的手势文件后,我们需要获取我们的手势文件,该手势文件的位置在:
1 /storage/emulated/0/Android/data/pack.GestureApp/files/gesture.txt
其中,gesture.txt 为手势文件的默认名称,你也可以将其修改,在这里我选择使用默认名称。
如果你成功找到手势文件了,需要将这个手势文件发送至你的电脑。
手势文件的位置
我们将我们的手势文件放置res/raw目录下。
Android Studio 的 res 目录下没有默认创建 raw 目录,因此需要我们手动创建。
到此,我们已经成功创建好了手势文件,并将其放置于指定的目录当中了。
手势的识别
通过手势的添加后,我们已经拥有了我们的手势文件,并放置在了指定的目录。
接下来我们可以通过一个示例来完成手势的识别。
activity_main.xml:
1
2
3
4
5
6
7
8
9
10
11
12
13
14
15
16
17
18
19
20
21
< RelativeLayout xmlns:android = "http://schemas.android.com/apk/res/android" xmlns:app = "http://schemas.android.com/apk/res-auto" xmlns:tools = "http://schemas.android.com/tools" android:layout_width = "match_parent" android:layout_height = "match_parent" tools:context = ".MainActivity" > <!--1.在布局文件中添加一个编辑框和手势组件--> < EditText android:id = "@+id/editText" android:layout_width = "200dp" android:layout_height = "wrap_content" android:layout_marginLeft = "40dp" android:layout_marginTop = "190dp" /> < android.gesture.GestureOverlayView android:id = "@+id/gesture" android:layout_width = "match_parent" android:layout_height = "match_parent" android:layout_alignParentBottom = "true" android:gestureStrokeType = "multiple" > </ android.gesture.GestureOverlayView > </ RelativeLayout >
MainActivity.java:
1
2
3
4
5
6
7
8
9
10
11
12
13
14
15
16
17
18
19
20
21
22
23
24
25
26
27
28
29
30
31
32
33
34
35
36
37
38
39
40
41
42
43
44
45
46
47
48
49
50
51
52
53
54
55
//2. 实现GestureOverlayView.OnGesturePerformedListener接口,并重写onGesturePerformed()方法 public class MainActivity extends Activity implements GestureOverlayView . OnGesturePerformedListener { private GestureLibrary library ; private EditText editText ; @ Override protected void onCreate ( Bundle savedInstanceState ) { super . onCreate (savedInstanceState); setContentView ( R . layout . activity_main ); //3.加载raw文件夹中的手势文件,如果失败退出应用 library = GestureLibraries . fromRawResource ( MainActivity . this , R . raw . gesture ); editText = findViewById ( R . id . editText ); if ( ! library . load ()) { finish (); } //4.获得GestureOverlayView组件,并且为其设置属性值和事件监听器 GestureOverlayView gestureOverlayView = findViewById ( R . id . gesture ); //设置手势颜色 gestureOverlayView . setGestureColor ( Color . BLACK ); //设置淡出屏幕的间隔事件 1000ms gestureOverlayView . setFadeOffset ( 1000 ); //添加事件监听器 gestureOverlayView . addOnGesturePerformedListener ( this ); } @ Override public void onGesturePerformed ( GestureOverlayView overlay , Gesture gesture ) { //5. 获取最佳匹配进行显示,并更新编辑框 //获取全部预测结果 ArrayList < Prediction > gestures = library . recognize (gesture); //保存当前预测的索引号 int index = 0 ; //保存当前预测的得分 double score = 0.0 ; //获得最佳匹配结果 for ( int i = 0 ; i < gestures . size (); i++) { //获取预测结果 Prediction result = gestures . get (i); if ( result . score > score){ index = i; score = result . score ; } } //更新编辑框内容 //获取编辑框原有内容 String text = editText . getText (). toString (); //在原有内容上追加最佳匹配结果 text += gestures . get (index). name ; //更新编辑框 editText . setText (text); //设置光标置于文字末尾 editText . setSelection ( text . length ()); } }
Android 核心与事件处理完